Monday, July 19, 2010

Weekly Gardening Outlook

This will be a continuing series. Each Monday we will look ahead at the coming week in gardening for the Northwest Arkansas area.


The onions are ready to be harvested.  Look for more discussion of onions later in the week.  The paste (cooking type) tomatoes are coming online.  The garlic is harvested and put up.  Peppers are starting to pop.  What does that add up to?  Well, almost any Italian dish really, but for us it's salsa making time!  The cilantro has all flowered due to the heat, so we had to resort to buying that at the local store.  Next to watermelons, fresh salsa is the best thing about summer gardening.  


     Flowering cilantro

In anticipation of the coming harvests, we are freeing up freezer space.  Last summer we raised 15 hens and 25 roosters.  We kept the 6 best looking hens and put the rest into the freezer.  We tried to keep the best two roosters around, but in our opinion, they just made too much noise for a suburban environment.  We are pressure canning the remaining meat.  Chicken salad anyone?


Things to be on the lookout for:


Japanese beetles are out in full force.  As we've discussed before here, they can be kept at bay on medium to small plants with a jar of soapy water and diligence.  On our pole bean arbor and large apple tree, this just isn't possible.  Too much real estate and too high up.  Being busy people, we let the beetles get a head start on our apple tree.  They did this much damage in a little over a week!  The tree will survive, as it has past attacks, but it now has much less foliage to gather the sun's energy.  The result will likely be smaller apples.  They are just now attacking our pole beans and we aren't going to go down without a fight.  So how to deal with this problem organically?  Our old friend neem oil to the rescue.  A twice weekly application should hold them off.  We are also attacking them on another front by spreading milky spore on the lawn.  This is a bacteria that invades beetle grubs and kills them within 1-3 weeks.  When that grub dies, it releases even more milky spore to take out other grubs.  This method is organic and safe for pets and children.  We'll keep you updated on our progress.

Weather outlook:
-Low 90's
-Dry; very slight chance of rain late in the week
-
Ten day forecast

What's being harvested:
-Green beans (Wow!  These pole beans are really producing!)
-Peppers
-Watermelons (Getting some delicious melons)
-Chard and kale
-Onions (Most are ready to harvest)
-Tomatoes
-Cucumbers (MANY cucumbers!)
-Kohlrabi (Should probably pull the last stragglers, but haven't yet)
-Squash and zucchini (Squash vine borer has hurt the harvest, but still getting some zucchini)
-Squash blossoms
-Celeriac leaves, basil, mint, and other herbs (all going strong)

Friday, July 16, 2010

Carrots

If you want a fall crop of carrots, now is the time to get them going.  We aren't raising carrots this year, but one of our customers is.  Their raised bed is 6" deep with very hard, rocky soil below the bed.  Six inches of soil isn't deep enough for most varieties of carrots and they will become deformed if they tried to grow into the hard, rocky native soil.  To get more soil depth in the raised bed, we took a page from Mel Bartholomew's square foot gardening book.  We built a 2' x 2' bed out of an untreated 2'x8" board (see picture).  We then placed this small bed on top of the 6" of soil in the existing bed and filled it with an additional 6" of a compost/peat mixture.  This gives 12" of soil depth for the carrots to grow in.

Tips and Tricks:
  • We've had very good success with scattering the seed on the soil surface and then lightly raking the soil surface with our fingers.
  • Keep the seeds moist during germination, but don't flood the area lest you wash all the seeds into one area and get poor seed distribution.
  • Carrot seeds take 2-3 week to germinate, so don't get concerned when they aren't up as quickly as other seeds.
  • After the plants are 2" high, thin the plants until there is 1-2" of space around each plant.
  • Carrots really are fairly pest free, but in previous years we have experienced carrot rust fly maggots eating the roots, armyworms eating the foliage, and a box turtle chowing down on the foliage.  With the carrot rust fly maggots, we just harvested everything right then before they could do more damage.  We handpicked the armyworms off with good effect, but if it had become a major problem we would have also treated with Bacillus thuringiensis.  Since going to a doubly raised bed, box turtles haven't been a problem.
  • Carrots will taste the sweetest if harvested between the first light frost of the year and the first killing frost of the year (usually early October here).
  • One of the joys of home growing carrots is that they come in more than just the typical orange.  Yellow, red, purple, and white are also available.  Have fun with it!
Putting up the harvest:
  • Pull them up when the soil is dry and leave them in the sun for a couple of days to cure.  Clean the dirt off and cut the greenery back to an inch.  Make holes in ziptop plastic baggies and store the carrots in them in a dark drawer of the refrigerator.  They will keep up to two months this way.
  • A second option is to store them in the ground.  Mulch them heavily with straw before the first hard freeze.  Then as you need them, pull away the straw and harvest through the winter.  This may only work when the carrots are grown in ground.  We haven't tried this with the extra tall raised bed.  It may get cold enough in the winter to freeze the soil in this exposed bed, and if so the carrots will be mush.

Wednesday, July 14, 2010

"Green" Beans


Green beans, string beans, snap beans, whatever you call them, they are a summer garden staple.  They can be grown in two ways.  Bush beans grow about two feet tall and do not require a trellis.  They produce all of their beans in a short period of time and are then pulled up.  Pole beans (a.k.a. runner beans) are a vine that can grow 10 feet or more in length and requires some sort of trellis.  They produce a steady supply of beans from early July until the first frost of the year, which is October 15th around here.

We have grown both and have really become firm in our preference for pole beans.  Because of the ability to trellis, pole beans take much less garden bed space than bush beans.  They produce a lot more beans over the course of a season.  They are MUCH easier to pick because they are right there at shoulder/head height.  Bush beans require bending over and searching for beans amongst thick foliage.  The arbor made from a folded cattle panel has really worked out well for us.  We planted beans in the beds on both sides and they have grown up and met at the top.  This has provided great access for picking.

We are growing a variety called the purple podded pole bean.  One reason is that the purple beans stand out against the green foliage, making finding them much easier when picking.  We've found that picking green colored beans is an easter egg hunt with grass colored eggs.  The other reason we like growing the purple beans is that they look cool and are a conversation piece when people visit the garden.  They turn green when cooked.  How neat is that?


Plant the seeds in mid-May with a trellis in place.  As they emerge, train them up to the trellis and they will do the rest.  The vines have a rough texture to them and they will aggressively wrap themselves around and around the trellis as they grow towards the sun.

Tips and Tricks:
  • Try to harvest the beans before they get noticeable bulges in them.  At this point they are starting to get too mature and won't be quite as tender as they could be.  They are still very edible if this happens and you will note from the pictures that we had some get to this size.
  • Snap the beans by hand and remove the "string" from each side of the beans as shown in the picture above.
  • Beans are good for your garden soil.  Being in the legume family, they take nitrogen out of the air and fix it into the soil.  This makes more nitrogen available in the soil for future crops.
Putting up the Harvest:

  • Freezing - wash, snap, and destring the beans.  Blanch the beans in boiling water for 3 minutes, then immediately immerse in ice water until cooled.  Pat dry and arrange on a cookie sheet so that they are in a single layer*.  Put them in the freezer for an hour and then put them in ziptop bags or vacuum seal them.  Keep them in the freezer until ready to use.
  • Canning - Consult a high quality canning manual such as the Ball blue book.
  • Dehydrating - Prepare and blanch the beans as if freezing them.  Dry in a dehydrator until hard as a rock.  They will store almost indefinitely this way.
*The beans won't be stuck together in a mass during freezing, allowing you to take as many or as few as you need from the bag.  

Monday, July 12, 2010

Weekly Gardening Outlook

This will be a continuing series. Each Monday we will look ahead at the coming week in gardening for the Northwest Arkansas area.


    Newly planted spaghetti squash vine emerging


Our spaghetti squash have been slaughtered by the squash vine borer (1 vine left).  Ever the optimists, we have replanted.  We should have just enough time to get a crop in before the first frost of the year.  It's our thought that this planting will be too late in the season for the squash vine borers to invade.  We'll keep you updated.  

Things to be on the lookout for:

    Adult cucumber beetle

If you have cucumbers, melons, or squash, be on the lookout for these small yellow beetles.  They can be spotted as shown above or striped as seen here.  The adults can damage leaves and fruits, while the larvae can damage the plant's roots.  These aren't really a huge problem except in very young plants or if you let the adult population get very high.  The real problem with these beetles is that they transmit a disease called bacterial wilt.  We have had every cucumber vine (8 in total) wiped out at a customer's garden this year due to this disease.  We just replanted.    


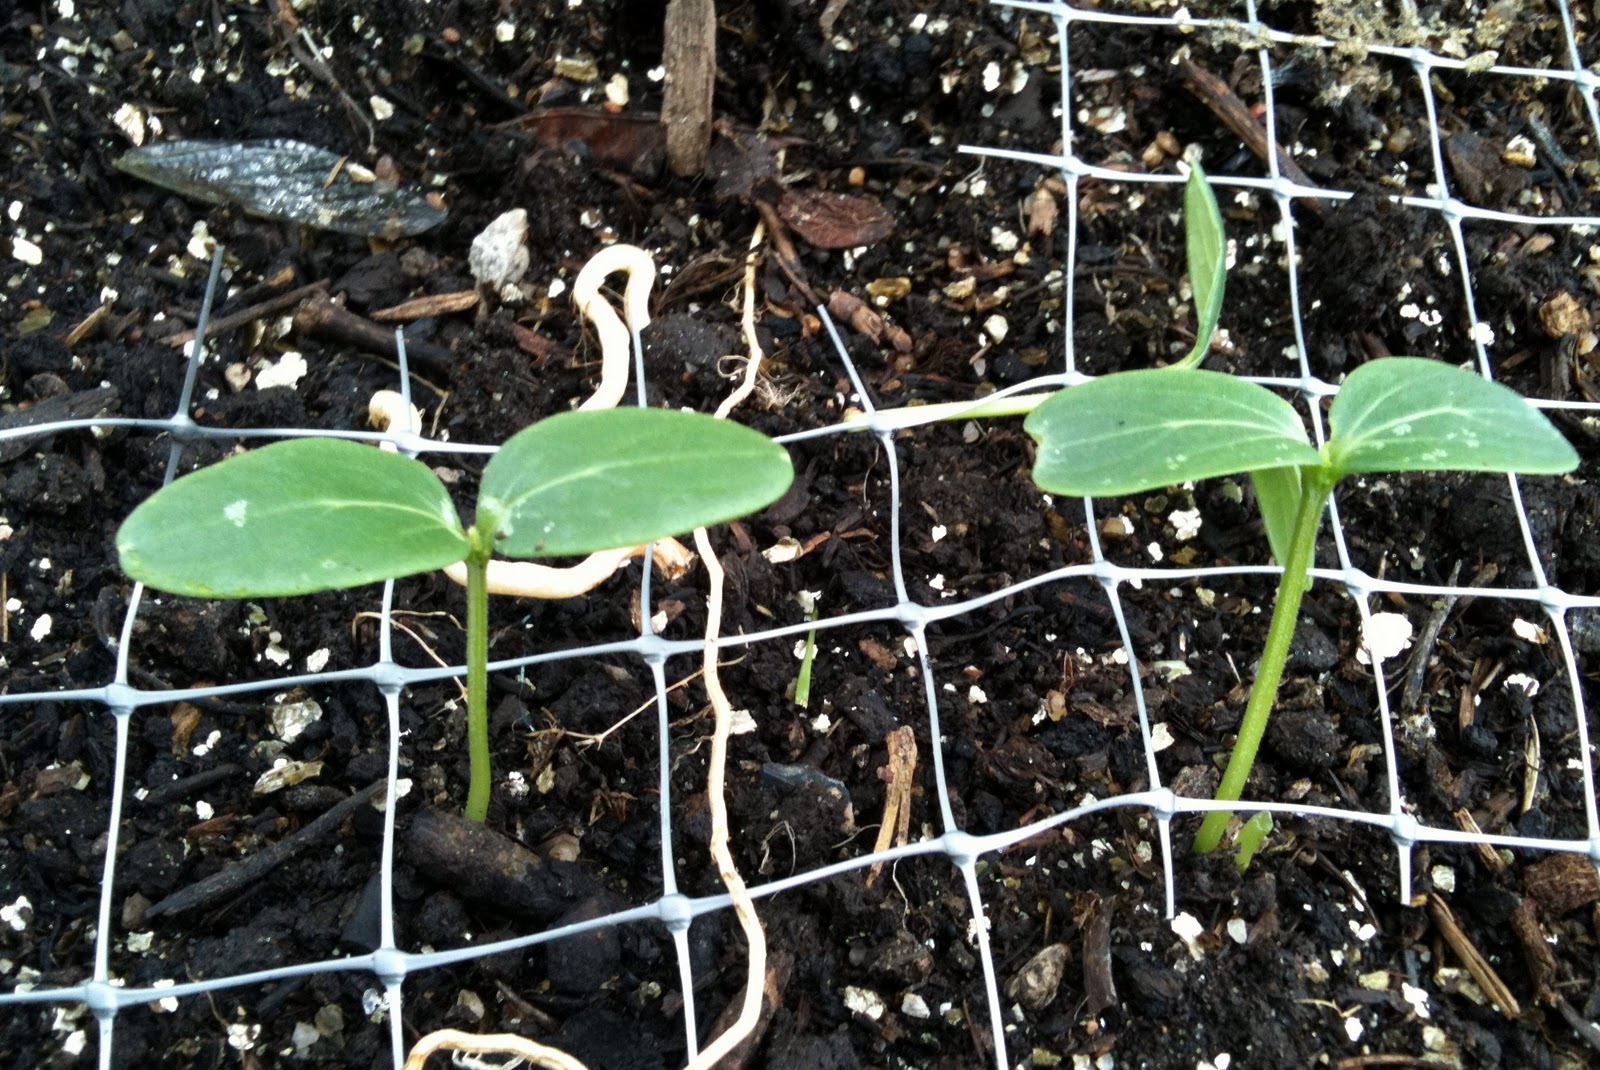
     Newly planted cucumbers emerging

So what can be done about it?  Once infected with the bacteria, nothing can be done for the vine.  The best strategy is so reduce the cucumber beetle population.  A regular coating of diatomaceous earth on the young seedlings will keep the beetles at bay.  Once the seedlings get up a little, our old standby neem oil will discourage feeding and reduce the population of cucumber beetles.  It has the added benefit of reducing any problems with mildew.

Weather outlook:
-Mid 80's early in the week; warming to low 90's late in the week
-Chance of rain today and tomorrow
-
Ten day forecast

What's being harvested:
-Green beans
-Peppers
-Watermelons
-Chard and kale
-Onions
-Tomatoes
-Cucumbers (MANY cucumbers!)
-Kohlrabi (almost all gone)
-Squash and zucchini
-Squash blossoms
-Celeriac leaves, basil, mint, and other herbs


Friday, July 9, 2010

Chicken Houses


When conceptualizing the design for our chicken house, we pondered and read about other home-built chicken houses at http://www.backyardchickens.com/coopdesigns.html.  We designed and built what we thought was the perfect chicken house.  Our chicken house works for us, but it turned out to be too large.  As you read we will show you what we did, what worked, and what we would change.


When designing a coop, the first thing that needs to be decided is if the chickens will free range around the yard or stay in the coop at all times.  The advantages of free ranging are reduced feed costs, less frequent coop cleanings, fewer insects around the yard, and healthier birds.  Disadvantages are increased risk of predators, the garden has to be fenced to keep the chickens out, and there will be some chicken poop in your yard.  Our coop door stays open at all times and the birds let themselves out in the morning and put themselves up in the coop at sundown.  Our dogs run with our chickens all day, so we haven't had any predator problems.  We built this coop with a dirt run because we envisioned them staying in the coop at all times.  Allowing them to free range turned out to be easy and the best solution for them and us.  The size of a coop should be determined by the maximum number of birds it will house, the size of the bird's breed, and if they will be allowed to free range or not.  If free ranging, 4 square feet of coop space is sufficient per bird for large birds like our Black Australorps.  If kept in the coop full time, allow them at least double that at 8 square feet per bird.  Bantams should require less space, but we have no direct experience with them.


Sometime in the next several years, we intend to move to a more rural location.  We wanted the ability to take our chicken house with us, so we built it on pressure treated wooden skids to allow it to be winched onto our flatbed trailer for transport.  Our trailer is a 5' x 12', so our chicken house was built 4'10" wide and 11'10" wide at the base to fit.   The bottom level is a 3' tall dirt run.  The upper coop area is 8' long and 3' tall with a 2' tall storage area above it making the coop 8' tall at its highest point.  Since it is built on skids and not concreted into the ground, stability in high winds was a real concern.  We drove four 6' t-posts 3' into the ground at each corner of the coop area.  These posts were secured to the coop with two pieces of 1" plumbing strapping each.  The coop hasn't moved an inch after a year with plenty of weather events.  The "windows" on the sides are covered in chicken wire and have covers that slide up and down in channels.  During cold times of the year the house is closed up except for one window on each side kept cracked to allow proper ventilation and moisture removal.  During the hot times of year, they are opened fully to allow maximum airflow.  These pictures were taken in early spring, when it still got down into the 50's at night, so all of the "windows" are cracked.


Our house includes four built-in nest boxes with outside access to aid in egg collection.  The outside access is a must, but if we had to do it again we would build removable nest boxes.  This would allow easier cleaning and the ability to remove them completely if we wanted to use the coop for meat chicken production.  Chickens tend to poop where they roost, so the nesting boxes have a slanted roof at about a 35 degree pitch to keep them from roosting on top of them.  We've found that 35 degrees has not been steep enough to prevent roosting, especially with younger and lighter birds.  A piece of old blue jeans covering the entrances and slit to allow the birds access encourages the hen to lay in the nesting boxes by giving them a safe, private place to lay.  Because we anticipated the chickens staying in the coop full time, chicken wire was placed over the collection openings to keep chickens on the nest from escaping when the doors were opened.  A 5" gap was left at the bottom to permit access for egg collection.  


This picture shows the defecation and the damage to the ceiling insulation the chickens did because they were able to stand on the top of the nest boxes.


The end of the upper coop is hinged to allow easy clean out.  Here you can see the removable roosting bars.  These are essential as an evening roosting place off of the floor keeps them out of their poop and concentrates it near the opening for easy cleaning.  The coop needs to be cleaned out about twice per year.


A 1"x12" board with wooden slats screwed to it serves as a ramp for the chickens to access the upper coop.  This feeder holds 40 pounds of feed and keeps our six chickens fed for several weeks during the summer with one filling.


The top covering of the dirt run is hinged to allow it to swing up and out of the way.  This allows a person to stand up and rake and shovel out the dirt run.  Since we began free ranging, cleaning this area hasn't been needed.


If we built one today, knowing that we were going to free range, we would build one that would only serve as housing for the nest boxes and as a roosting spot for the chickens at night.

Tuesday, July 6, 2010

Weekly Gardening Outlook

This will be a continuing series. Each Monday we will look ahead at the coming week in gardening for the Northwest Arkansas area.


      First watermelon of the year

I hope you all had a great 4th of July holiday!  We harvested our first watermelon of the season this weekend.  It was very sweet, but still needed a few days on the vine.


      Salvaged spaghetti squash from dying vines

About 70% of our spaghetti vines succumbed to the ravages of the squash vine borer (SVB) despite our best efforts at cutting the buggers out of the vines.  We harvested 4 squash from the dying vines, but they may or may not turn out to be mature enough to eat.  It appears that the remaining vines are going to pull through.  The adult SVB moths are nearing the end of their mating cycle (i.e. egg laying).  Our plan B is to replant the destroyed vines now with the idea that they should escape the SVB and still have enough time to produce for us before our first killing frost arrives in mid-October.  That's the
plan; we will keep you posted.


Things to be on the lookout for:

We are still finding and smashing squash bug eggs and nymphs here and there.  Check your squash leaves for eggs once a week.


      Mexican bean beetle nymph


We found an adult Mexican bean beetle and several of its nymphs on watermelon vines, squash plants, and sweet potato leaves.  We didn't get a picture of the adult because it was mistaken for a lady beetle, which is a very beneficial insect for the garden.  The Mexican bean beetles are in fact in the same family as the lady beetle.  They are larger than a typical lady beetle, orangish brown, with black spots.  Images of the adults can be seen here.  The nymph (pictured above) is small at only a half inch long, yellow with black spikes protruding from the body.  They defoliate garden plants relatively quickly, so visiting your garden daily is imperative.  Hand picking nymphs has kept us from experiencing damage from them this year.  If you get a heavy infestation, neem oil is effective against them.

Weather outlook:
-Low to upper 80's
-Chance of rain every day
-
Ten day forecast

What's being harvested:
-Watermelons

-Chard and kale
-Spaghetti squash (much too early)
-Onions
-Hearing reports of red tomato harvests (ours are STILL green)
-Green tomatoes
-Cucumbers (MANY cucumbers!)
-Kohlrabi (almost all gone)
-Squash and zucchini
-Squash blossoms
-Celeriac leaves, basil, mint, and other herbs
-Radishes


What's coming soon:
-Red tomatoes
-Peppers

Thursday, July 1, 2010

Rain Barrels


A rain barrel is a useful addition to any backyard garden.  In addition to reducing the water bill and the drain (couldn't resist the pun) on the local water system, it provides a superior water source for the garden.  Water from a rain barrel will not contain chlorine, which can reduce the beneficial microbe levels in the soil.  It will also be warmer than the water from the tap, which will help warm the garden's soil for faster plant growth early in the year when the ground hasn't warmed up yet.  Note that too much heat can scald plants.  A black barrel in full sun is a bad idea.  Ideally a barrel should be in a shaded to partially shaded location.  Another nifty feature is that when on vacation, the valve to the barrel can be left open.  This will water the garden fully with even a brief, light rain shower because the large square footage of a roof will amplify the rainfall.

We installed a rain barrel in our garden and in a customer's garden this year.  Each came with a drain spigot on the bottom, an overflow hose at the top, a screen covered opening at the top, and a manual shut off valve for the drain hose.  The screen covering the opening at the top is to keep mosquitoes and debris out of the barrel.  Both were installed under existing rain gutter downspouts on concrete blocks to raise them up for increased water pressure.  Our barrel (pictured up top) needs to be raised some more.  The downspout in our garden was cut to fit.  In the customer's garden (pictured right), we removed the whole downspout and replaced it with a flexible plastic tube that allowed us to position the rain barrel around the corner from the downspout.  We connected these barrels to soaker hoses installed in the garden.  If you choose to install a rain barrel, please make sure that it is stable.  No one wants to read about a 400 pound barrel of water being pulled over on a child.

When it rains, we shut the valve to the garden off and collect water for later use.  During prolonged dry periods, we fill the barrel up with tap water in the morning, giving it all day to warm up and dissipate chlorine.  Just before bed, we open the valve and let it water the garden all night.  Watering at night has the added advantage of reducing water loss from evaporation, allowing more water to get to the plant's roots.  This method has worked reasonably well for us.  The only issue we have found is that dust from the roof gets washed into the barrel.  While the dust poses no threat to a garden, it does begin to clog the tiny pores in the soaker hose after a few waterings.  What works for us is to water with pressurized water from the tap every 2-3 waterings.  This opens the pores back up allowing the relatively low pressure from the rain barrels to work again.


If  pressurized water is not near the garden, there are a couple of workarounds.  A water wand can be used to manually water each plant.  The other option is a first flush diverter that will discard the first bit of rainwater that comes from the gutter.  The theory is that after the rain has fallen sufficiently to clean the roof, the diverter begins to send the cleaner water to the barrel.  We have not gone this route, but are considering it. 

To increase water catch and storage capabilities, multiple rain barrels can be linked together with short hoses.  If linked at the top of the barrels, they will fill in a chain reaction as one barrel overflows into another and then into another.  This requires a drain valve in the bottom of each barrel to be able to use the water.  A better method is linking them at the bottom, which will cause each barrel to fill at the same time and drain at the same time.  This allows just one drain valve in one barrel to draw water from all of the barrels.  All barrels should be on the same level or maximum capacity will not be reached. 

A rain barrel is a fairly simple device that can be built for much less cost than the $75+ that they go for on the market.  We suggest looking for empty pickle/olive barrels as these are food grade and have a screw top that can easily be fitted with a piece of window screen.  Here is an example of a converted pickle barrel.  You may wish to paint the exterior of the barrel for increased UV resistance, longevity of the plastic, and blending into the landscape.  Use high quality brass fittings and semi-rigid overflow/barrel connection hoses and you will have a superior barrel for less than the cost of buying a commercial one.