Sunday, August 26, 2012

Happenings around the home place


Holes in a nylon flag
Holes began to appear in the white areas of the flag out front.  I had no idea what was causing it until I noticed this:


Apparently red wasps were chewing out the holes in the nylon flag.  Anyone have insight into why they were doing this?  I have since replaced it with a tougher polyester flag and the wasps have left it alone.

BIS high efficiency fireplace
During the winter, our main heat source is an EPA certified high efficiency wood fireplace with a blower.  Having moved in February, we got to use it some.  It kept the upstairs and livings areas nice and warm and burned 6-7 hours between loadings, but it wasn't sufficient to heat the peripheral rooms fully.  We had to use the central furnaces in the mornings to take the nip off.  While we were pleased with its performance, the wood I gathered from the property at the time wasn't fully dried and wasn't optimum.

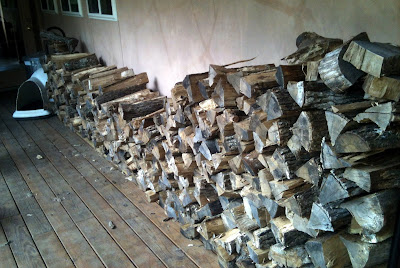
Logs left by the previous homeowner
Wood split and stacked
I've been splitting existing logs and cutting dead standing timber to build a dry stockpile for the coming winter months.  There's something very satisfying about heating with wood and having good log pile put up.

Thursday, August 23, 2012

Quick garden update


Stewed tomatoes, peppers, white onion, and cilantro.
Moving into the new home place in February, there wasn't much chance to build beds and build up the soil.  Salsa ingredients aren't demanding and tolerate unprepared soil well, so I planted the both existing beds with tomatoes, onions, and peppers.  Knowing that I would be busy with many other things, I eschewed open pollinated varieties and planted Burpee hybrid Romas.  Despite the unusually long stretch of 105+ degree days and low rainfall, they have produced admirably.  So much so that they shaded out the peppers and onions to a degree.

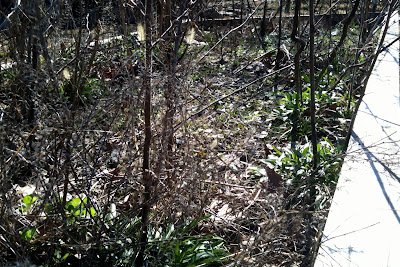
Existing raised bed
Tomatoes, peppers, and onions
Pepper with wood mulch
GARDEN EXPERIMENT:  The new place had a large pile of wood mulch onsite when we bought it, so I planted half the garden with 4" wood mulch and the other half with 4" of straw.  I have seen no discernible difference in growth or production between the different mulches.  Good to know.


Saturday, March 31, 2012

Pedicure!


I used dog nail trimmers to trim the sharp points from the rooster's spurs to reduce the danger posed to my children.  He bled a little when I got into the quick, but a few days later seems perfectly fine.  In the picture above you can see the trimmed spur on the right.  The untrimmed spur on the left is on the verge of shedding its outer layer, much like a cat sheds its claws to maintain sharpness.

Saturday, March 24, 2012

In this case, the chicken came before the egg

The hens must be happy in their new digs because three days ago I found this:


Then yesterday three more!


And today they left me four!  


The hens have been much quicker to get back into production after the move than I anticipated and seem they to be ramping up production by the day.  On a down note, the rooster got after my 5 year old a bit today.  I was there and immediately let the rooster know who was boss.  I'd like to keep him, but I can't have him terrorize the kids.  I'm going to trim his spurs to blunt them and give him one more chance.  I'll admit that I'm not hopeful.  It's hard for older animals to break bad habits, especially when they are full of testosterone.

Friday, March 23, 2012

Trying a little something different: Seed Tape


I was perusing my local seedshop looking for lettuce seed and spied this.  I've seen seed tape before, but never used it.  The price difference wasn't much as compared to a packet of loose seeds, so I decided to give it a try.


A seed tape is nothing more than a strip of thin paper with seeds placed at specific intervals.  Above, you can see three strips of seed tape.  A strip is planted in a furrow where the paper softens when exposed to water and the seedlings push through it easily.  With small, hard to manipulate seeds like lettuce or carrots, this makes planting simple and prevents over seeding.


Lettuce seed is planted very shallowly, so I just laid the tape on the soil and covered it by lightly sprinkling a small amount of soil over it.  The tape above is half covered.

Thursday, March 22, 2012

Chicken and Garden Update


Any time you stress hens by doing something like moving them, they are liable to go into a molt and quit laying eggs.  The hens haven't laid an egg since they've been here, but I expect they will sometime in the next 2 months.  They continue to reliably put themselves up in the hen house at dusk.  All, but one have gotten the idea that roosting in the nest boxes is a bad idea.  I continue to pick up and move her out of the boxes and onto a roosting bar each evening.  She'll get the idea.


The radishes are coming up nicely.  We've had beautiful weather in the mid 70s.


True to form, the cilantro is doing just fine after separating store bought starts.


The onions are poking their bright green heads up.

Wednesday, March 21, 2012

The chickens have left the building


The chickens spent their first week in the coop learning that this is their new home.  This is the warm, dry place with food and water.  I want them to be able to free range on the property, but to return to the hen house each evening for safety's sake and also to lay eggs.  It's no fun going on an Easter egg hunt through the brush every day.  

*Note the steel trashcan.  This is an easy, rodent proof and waterproof feed container.


That week passed and with some trepidation, I opened the door and watched to see what they would do.  They started peering out the door getting more bold with each look.  After about 10 minutes, the rooster hopped out.  Soon they all followed and began happily scratching around looking for something to eat around the pond.  

I went about my business and when I checked on them at dusk, all had returned and were safely in the house.  Seven were on the roosting bars and three had decided to roost in the nest boxes.  I picked up the three nest box birds and put them on the bars.  If they develop the habit of roosting in the nest boxes, they will fill them with poop at night.  That's not a good thing to have eggs covered in.


That's a good looking rooster!

Tuesday, March 20, 2012

Quick Tip: Getting a deal on Cilantro


I planted six cilantro plants last weekend, but only paid for two.  How?  When you buy cilantro starts from the big box store, they are almost always planted with 3 or 4 seedlings per pot.  You can see the three distinct seedlings in the closeup above.  Don't just plant the whole thing in one spot.  Spread them out a little bit for more production.  


Remove the cilantro from the pot.  

*Note the wooden template in the background.  I plant cilantro 4 plants per square foot.


Cilantro is a very hardy plant that can handle rough treatment.  Using a serrated knife, divide the rootballs into thirds (or quarters depending on the number of seedlings).  Plant them according to label instructions and water well.

This also works very well for basil.  It's too early in the year to plant basil, so lock this trick away for later.

Monday, March 19, 2012

Radish Planting


Radishes are one of the quickest crops I grow, taking as little as 3 weeks to mature.  They like the mild weather of spring and fall, but can be grown almost year round with cold frames.  I want a couple of dozen radishes a week, so I plant 32 new radishes every weekend to keep a constant supply at hand.  I always plant a few more than I want because I'd rather give away extras or feed them to the chickens than come up short.

Start with a level, weed free soil surface in a sunny location.  I plant 16 plants per square foot using a wooden template that I made.  


This antler from a small deer I shot is perfect for making 1/4" deep divots in each opening.  Into these divots I drop 2 seeds per opening.  Seeds are inexpensive and this insures that I will have a radish in each spot.


Once the seeds are in place, I sprinkle a little loose soil over the template and then wipe it clean.  This covers each seed to a uniform depth.  Lightly water in place being careful not to disturb the seeds.  

Saturday, March 17, 2012

We have chickens again!


A friend of my sister-in-law gave us an Ameraucana rooster (back left in the picture above) and 9 hens (Ameraucana, Red Star, and Black Star) recently.  They are a mix of ages ranging from 1 to 3 years.  They seem to be very tame and gentle, allowing me to walk up and pick them up without too much problem.  

I love hearing the crows of a rooster again and may let a broody hen raise some chicks this summer.  Despite the rooster's sharp 1 1/2" long spurs, he seems quite docile.  I've "interacted" with a few roosters that were truly mean and would attack humans relentlessly with those sharp spurs.  We have young children whose eyes are within easy striking distance of an aggressive rooster, so even though I'm looking forward to having him around, if he shows any aggression towards humans he will wind up in the soup pot.


The house needed a good clean out from the chickens of the previous owner.  I shoveled everything out and piled it outside to compost*.  I put a layer of fresh pine shavings on the floor and straw in the nest boxes. 


The house has roosting bars already in place.  These are really important, because chickens like to roost up high while they sleep at night.  In the off chance a predator gets into the house at night, the chickens will still have some protection because they are up off the floor.  Chickens also defecate a lot at night and this keeps them up and out of that.


Good ventilation is essential for a hen house.  Their droppings can produce a lot of ammonia, which can cause all sort of health issues for the chickens if it builds up in the house.  The house has two chicken-wire covered windows on one side of the house.

*Never put chicken litter directly into your garden.  It has too much nitrogen and needs the composting period to mellow.  Also, applying fresh manure to food growing areas poses a risk of bacterial contamination of food.

Friday, March 16, 2012

Seed Starting


Starting your own seeds can be a great way to cut costs if you need a lot of seedlings or a way to get specific varieties that you want even if your local nursery doesn't carry them.  I buy some things and start others myself.  What and how much I start varies by year and inclination.  This year we are still unpacking and I have A LOT of projects to focus on.  So I am only starting tomatoes (early, cherry, and Roma), peppers (salsa variety pack), and basil.  

If this is your first year gardening, I would not advise you to start your own seeds.  The first year is discouraging enough and there is enough to learn without adding seed starting.  But if you're an experienced gardener, give it a shot.  In the picture above, you can see my gardening workbench.  It is on the south wall of my garage near a sunny window.  The garage is semi-heated and doesn't get below 55-60 degrees at night.


On top of the bench is a grow light stand that I constructed out of 2x4s and plywood.  It is wide enough to house four 12"x24" flats of seeds.  This year I am only starting two flats.  The lights are two ordinary 4' long double bulb shop lights hanging side by side.  The bulbs are standard fluorescent bulbs.  They hang on chains from eye hooks, which allows height adjustment by just unhooking and hooking into a different link on the chain.  They are raised up and out of the way in the picture, but once the seeds begin to emerge I will lower them to keep the bulb within an inch of the seedlings.  The closer the better (without touching).  As the seedlings grow, I will raise the bulbs to accommodate them.


I have the lights on a timer set to turn them on at 5:00 a.m. and off at 11:00 p.m.  The sunny window is nice for the plants, but it is not sufficient to grow strong, stocky plants.  You MUST use artificial light or your plants will be long, thin, and weak.


A quality soil-free seed starting mix is essential. Do not use soil from your garden or bagged garden soil because it can contain pests and pathogens that can wreak havoc on young seedlings. If you are unable to find a good professional seed starting mix, a 50/50 peat moss and sand mixture can be used in a pinch.

Seeds cannot be allowed to dry out during the germination phase, but also shouldn't be floating in soil soup either. I mist the flats with a spray bottle to keep the soil like a well wrung out damp sponge. Some people cover the trays with plastic hoods or wrap to maintain moisture, but I really prefer the control a spray bottle gives me.

I use a waterproof seed starting mat to warm the seed flats from below.  This gives much quicker germination and more uniform starts.  I unplug it once all seedlings have emerged. (Edit to add: My basil seeds have emerged in 48 hours, when they would take 5-7 days without a mat).

Tip:  Plant more than one seed per container and when they are a week old cull the smallest seedling by cutting it off at soil level with scissors.  This ensures against seeds that fail to germinate and gives you the strongest seedlings possible.  Seeds are cheap, your time is not.


Marking what seeds are planted where is important.  I cut strips out the sides of a rinsed out milk jug and write on them with a fine tip permanent marker.

Thursday, March 15, 2012

It's Onion Planting Time


It's time to get those onion sets or transplants in the ground.  Above you can see my yellow and purple onion sets, ready to be covered over with an inch of soil.  


When planting onion sets you will come across mildewed bulbs (above left).  These should be discarded.  Choose bulbs that are clean and solid feeling (above right).  A small (~1/4") sprout coming from a bulb is acceptable, but bulbs with long sprouts already on them (above middle) aren't a good choice.


If you follow the label instructions on the sets, onions are pretty maintenance free.  However, if you desire more information here's a great resource for onion growers:  http://aggie-horticulture.tamu.edu/archives/parsons/publications/onions/oniongro.html

Tuesday, March 13, 2012

Bed Preparation


The new home place already has two raised beds and for expediencies sake I will plant in them this year.  Unfortunately, they are in the Bermuda grass lawn and are already infested with the stuff.  Once a bed is infested with Bermuda grass, it's almost impossible to eradicate without the use of harsh chemical herbicides (which I refuse to use).  The plan is to build new beds in a Bermuda grass free area of the property and transition to those as possible.


The beds had lain fallow for the previous year and were overrun with weeds.  The upper bed was filled with a forest of 3-4' tall weeds.  I pulled out all large weeds by hand and then cleaned up the surface with a hula hoe.  The hula hoe is a simple blade that travels just under the soil surface and cuts off the weeds at the root.  Because it doesn't dig deeply into the surface, it can be used during the growing season right up to the edge of crops.


The lower bed was especially overrun with Bermuda grass.  I burned it off to dethatch it, then cleaned up the surface with the hula hoe.  After a few days, I went back and used the hula hoe to remove anything that remained green.


Friday, February 17, 2012

Dig In! Food and Farming Festival

This year's festival is being held in Fayetteville on March 2nd and 3rd. It will include gardening classes, films, and a seed swap. Be there or be square.

http://diginfestival.com/

Excerpted from the website:

"Friday, March 2, 2012
5:30-6:30 p.m. Opening Reception & Supporter Appreciation
Reception details & site TBA. Ticketed Event
Ticket Booth Open

7p.m.
Festival Welcome & Film: Truck Farm (50 min)

8p.m.
Film: Food Fight (72 min)

~~~~~~~~~~~~~~~~~~~~~~~~~~~~~~~~~~~~~~~~~~~~~~~~~~~~~~~~~~~~~~~~~~
Saturday, March 3, 2012
9 a.m.
Coffee & Treats: Free Info-Fair Opens
Tastings and Treats may be sampled as they are added throughout the day.

9:30 a.m. Festival Welcome & Panel Discussion:
Hunger in the Land of Plenty: Cultivating a Sustainable Food System
(Sponsored by Feed Fayetteville) The panel discussion is free, and all are welcome.
The family-friendly film What’s on Your Plate (76 min) will show concurrently as an alternative activity. (Film repeats at 2:30 p.m.)


11:00 a.m. Concurrent Events:
Class: Growing Nutrient Dense Produce with Calvin Bey
Class: Good Bugs/Bad Bugs with Amber Tripodi & Sam Kim
Class: Growing & Using Herbs Karyn Zaremba (time is tentative)
Film: King Corn (91 min)
Film: Urban Roots (93 min) (repeats in p.m.)
Kid’s Area: Drawing Tables
Info Fair Continues

1:00 pm Concurrent Events:
Class: Beginner Gardening & Composting with Jane Maginot & Dana Smith
Class: Backyard Chickens with Mariah & Ira White
Class: Cooking in Season with Chef Tuesday Eastlack
Film: Local Farm Tours on Film (50 min total)
Film: Seed Swap Ozarks (72 minutes)
Kid’s Area: Drawing Tables
Info Fair Continues

2:00-5pm FCGC Free Seed Swap!

2:30 p.m. Concurrent Events:
Class: Beginner Backyard Beekeeping (teacher TBD)
Class: No-Till Farming: how to create a perfectly natural and nutrient-rich soil to grow your plants with Patrice Gros
Class: Cooking in Season with Chef David Lewis
Film: What’s on Your Plate (great for families- 76 min)
Film: Food Fight (72 min) (shows on Friday p.m. also)
Kid’s Area: Drawing Tables
Info Fair Continues

4 p.m. Concurrent Events:
Class: Seed Saving with Herb Culver
Class: Creating an Edible Landscape with Leigh Wilkerson
Class: Basic Food Preservation Ideas (time is tentative) with Lucy Kagan
Film: Economics of Happiness
Film: Queen of the Sun (82 min) (repeats in p.m.)
Info Fair Continues

5:30 p.m. Concurrent Events:
Film: Food Fight (72 min) (also plays Friday evening)
Films-Double Feature: Truck Farm (50 min) & Greenhorns (50 min)
Info Fair Continues

7:30 p.m. Concurrent Events:
Film: Queen of the Sun (82 min)(also plays at 4 p.m.)
Films: Urban Roots (93 min) (also plays at 11 a.m.)
Info Fair draws to a close…

9 p.m. Festival Concludes

Dig In! is Friday, March 2 & Saturday March 3, 2012. Please note this schedule is a tentative DRAFT! Times & some events could change. Stay tuned to www.diginfestival.com for updates. Location: Global Campus Center on NE corner of Fayetteville Square (unless otherwise noted)
Individual event tickets available at the door. Suggested donation for each class/film you attend is $5 (more if you can/less if you can’t). We are operating on donations and all funds go into the festival. Weekend Supporter Passes start at $30 via website and at the door. Please consider being a supporter! We want everyone to be able to attend— and also hope for enough financial support to pay for the festival and do this again next year. Seed Swap, Panel Discussion & Info-Fair are free!"